


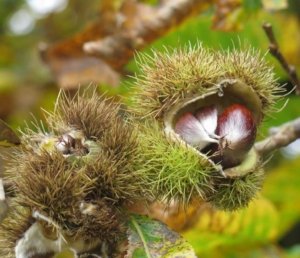
Sweet chestnuts are autumn’s treat, look for spiky green cases on the woodland floor. Crack them open for glossy brown nuts, perfect for roasting or adding to seasonal dishes. They’re a bit fiddly, but totally worth it!
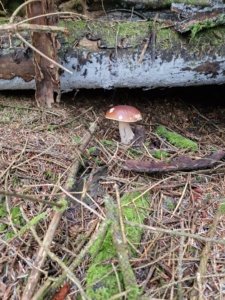
Penny Buns (Boletus edulis)
Penny Bun (Boletus edulis). The penny bun, aka porcini, is the king of wild mushrooms, popping up in beech and oak woods after rain. With a fat white stem and brown cap, it’s easy to spot. Fry in butter or add to risotto for a real wild flavour.
What will you be on the forage for this month?

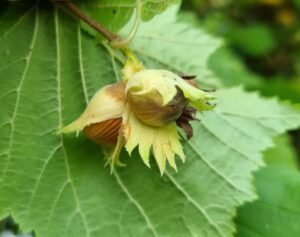
First up is hazelnuts (Corylus avellana). So much sweeter and more than their shop-bought equivalent, not to mention free! Can you believe that at the time of writing they cost over £20 a kilo, but if you get there before the squirrels they’re absolutely free!
You can eat them raw from the tree or roast them for an intense chocolatey flavour.
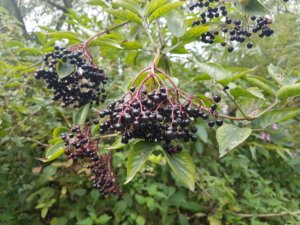
Late in August you’ll find these delicious little bombs of flavour and medicinal goodness dripping from Elder trees.
Wait for them to ripen to almost black, and cook thoroughly to make jams, sauces, wines and desserts.
What will you be on the forage for this month?


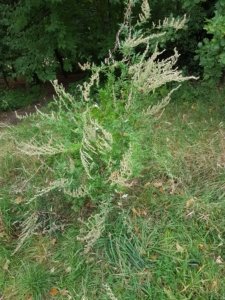
Foraging tip: Always double-check your ID, as mugwort can be confused with other Artemisia species. Avoid if pregnant, and as with all wild plants, only eat after positive identification.
What will you be on the forage for this month?

Alexanders in flower

Crow garlic

Pignut leaves
What will you be on the forage for this month?

Ground elder

Garlic Mustard leaf
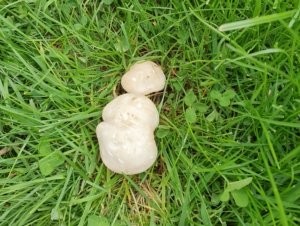
St. George’s mushrooms
What will you be on the forage for this month?

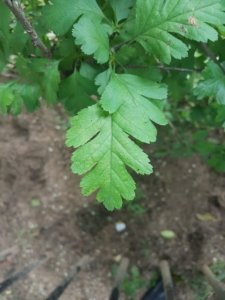
First up is Hawthorn leaves (Crataegus monogyna). The leaves appear in early spring and have a distinctive, lobed shape. I’ll be eating the leaves raw in salads, and as a snack straight from the tree. My favourite use for them is to flash fry them in hot oil (10 seconds max) and sprinkle with sea salt for a nutty, leaf crisp.
You can find a video recording of the Hawthorn Wednesday Weed Waffle here, also included are an audio recording and an accompanying eBook.
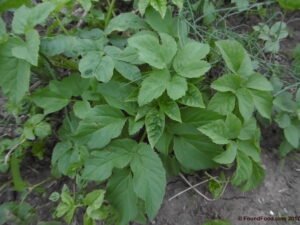
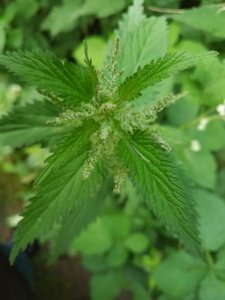
Stinging nettles (Urtica dioica) grow just about anywhere but they particularly like waste ground and road side verges. I could literally fill a day with talking about nettles, but my favourite use for them in spring time is to make cordial for refreshing cold drinks and warming hot drinks.
You can find a video recording of the Stinging Nettle Wednesday Weed Waffle here, also included are an audio recording and an accompanying eBook.
Wild garlic (Allium ursinum). I can’t talk about spring without mentioning wild garlic. Although nasties grow alongside it, there’s nothing that looks like it and smells of garlic so you can’t really go wrong. Much like everyone else, my favourite use is to make cheese and wild garlic scones.

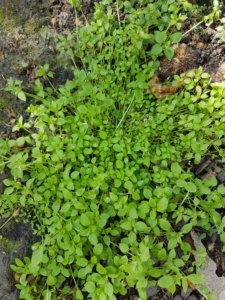
Chickweed is nutrient and medicinal component rich, and grows just about everywhere, and in large quantities. It tastes like a mild rocket leaf raw, and is so freely available that it’s a surprise that we don’t use it more.
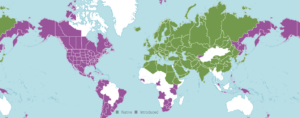
Stellaria media is widespread in North America, Europe and Asia. A cool-season annual plant native to Europe, but naturalized in many parts of North America.
The plants are annual and with weak slender stems, they reach a length up to 40 cm, and can form mounds 50 cm high on rich soil. Sparsely hairy, with hairs in a line along the stem. Very common in lawns, meadows, waste places and open areas. It likes growing in disturbed soil and can produce new plants from seed several times a year.

The name Stellaria is derived from the word ‘stellar’ meaning ‘star’, which is a reference to the shape of its flowers. Media is derived from Latin and means ‘between’, ‘intermediate’, or ‘mid-sized’.
Stellaria media is edible and nutritious, and is used as a leaf vegetable, often raw in salads. It is one of the ingredients of the symbolic dish consumed in the Japanese spring-time festival, Nanakusa-no-sekku.

Chickweed has a very long history of herbal use, being particularly beneficial in the external treatment of any kind of itching skin condition. It has been known to soothe severe itchiness even where all other remedies have failed.
Young leaves can be available all year round if the winter is not too severe. Seeds may also be available for most of the year.
For medicines, Chickweed is best harvested between May and July, it can be used fresh or be dried and stored for later use.


First up is Dandelions (Taraxacum officinale). They sometimes persist through the winter and are always one of the first to appear in spring. I’ll be the leaves raw in salads, the roots for a flavoursome coffee substitute and when the flowers appear I’ll be making wine.
You can find a video recording of the Dandelions Wednesday Weed Waffle here, also included are an audio recording and an accompanying eBook.
Scarlet Elf Cup fungus (Sarcoscypha coccinea) love to grow on dead wood, particularly silver birch, and in wet conditions. They grow up to 5cm and are deep red. They’re edible raw or cooked, and because of their shape and colour I like to float them in bowls of mushroom and bittercress soup.

Chickweed (Stellaria media) is nutrient and medicinal component rich, and grows just about everywhere, and in large quantities. It tastes like a mild rocket leaf raw, and is so freely available that it’s a surprise that we don’t use it more.


First up is ground ivy (Glechoma hederacea). It persists through the winter and is easily recognisable with its kidney shaped, scalloped edged leaves, and mint-meaty smell. I’ll be using it in stocks, gravies and sauces, as well as to flavour creams in desserts!
You can find a video recording of the Wednesday Weed Waffle zoom call, an audio recording, and an accompanying ebook here: https://courses.foundfood.com/ground_ivy

Hairy bittercress (Cardamine hirsuta) which is neither noticeably hairy, nor bitter, but does taste exactly like cress! Lovely in sandwiches, salads, and of course the classic egg salad.

Judas’ ears fungus (Auricularia auricula-judae) also known as wood ears and jelly ears, and formerly known as Jew’s ears. These mushrooms really stand out at this time of year with their dark skin colour and ear shaped growths. They’re pretty versatile, you can powder them and use as a thickener, or dehydrate them then rehydrate in your favourite syrup or liqueur and dip in chocolate.
