It has taken me a while to post this, so apologies for my tardiness. Earlier this year, in conjunction with Bwyd Powys Food and Builth Wells Community Hub, I led a wild food and foraging session with the aim to help local low or zero income families to learn about seasonal eating and how to improve their health for free, whilst increasing their nutritional intake.
It was a bit wet and cold, so a few people dropped out but we had eight people out and getting wet whilst learning about what is safe to eat and what isn’t, including 5 adults and 3 children.
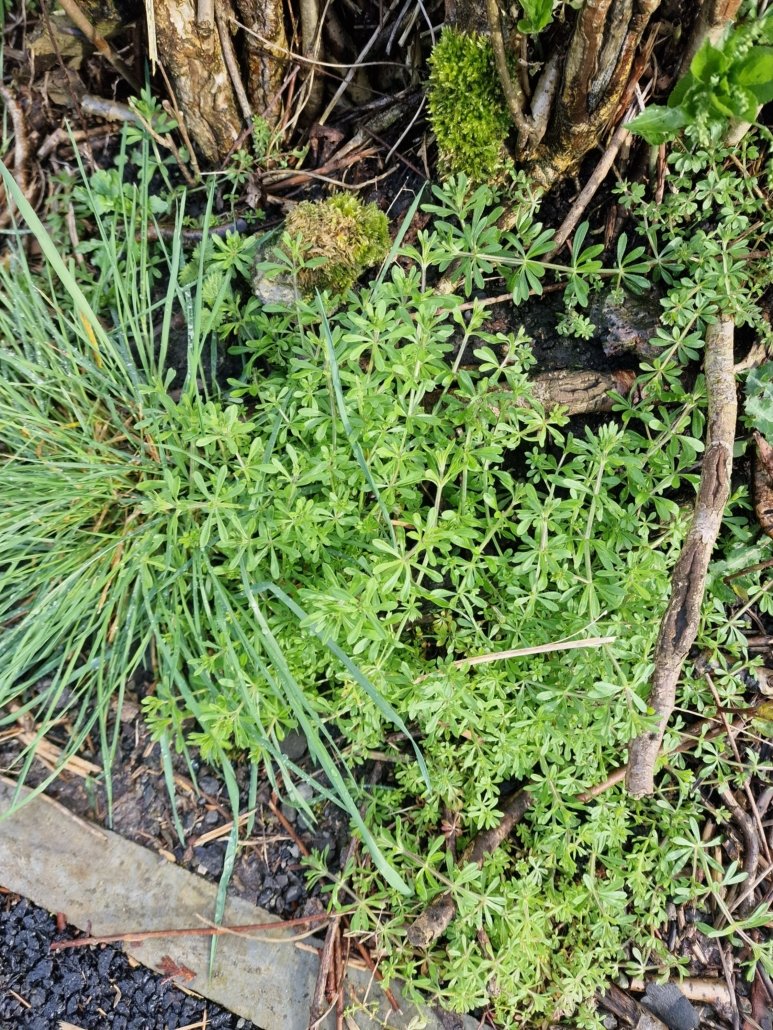
We saw Stinging Nettles, Plantain, Dock, Hawthorn, Ground Elder, Cleavers, Mullein, Dandelions, Blackthorn flowers, Common Sorrel, Garlic Mustard, and Ground Ivy.
The learner foragers each took an identification card and harvested their chosen plant to be taken back to the hub.
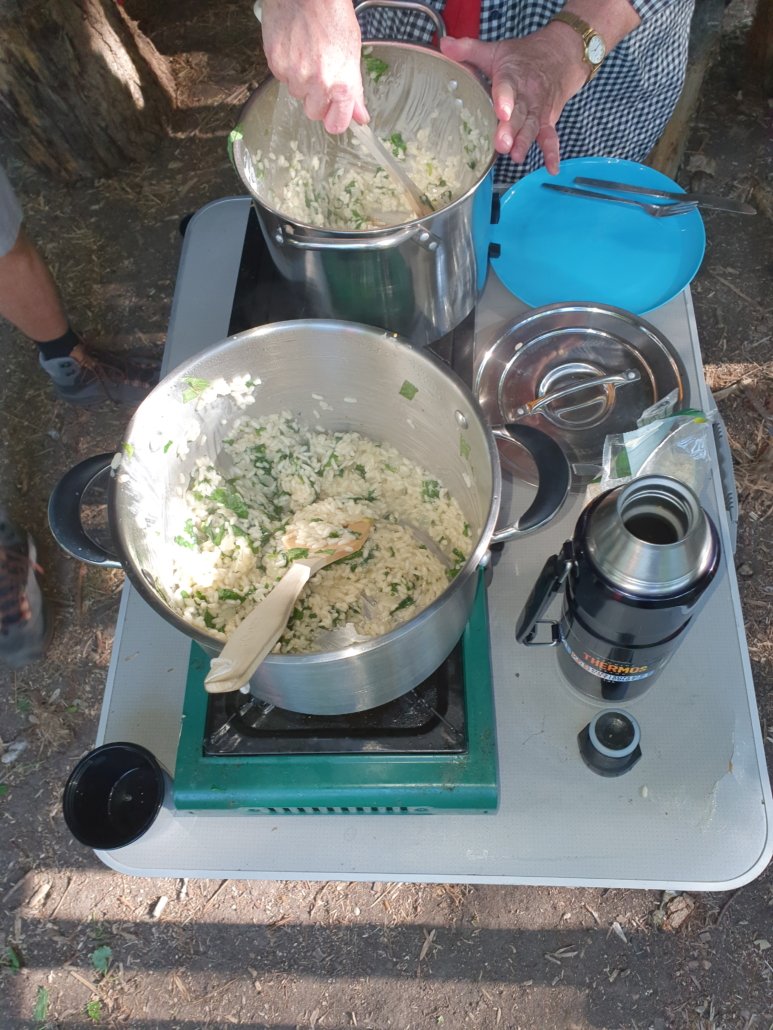
Back at the hub we added some of our herbs to hot water to infuse and make a stock, meanwhile we got to chopping onions and plants. The younger members were tasked with frying the onions, adding risotto rice and gently cooking the risotto whilst adding the stock. When the risotto was cooked, they added the chopped plants and some grated cheese.
The risotto went down really well (especially with the younger foragers! Adults, take note, lol).
The session went down well, and we hope to repeat it at other times in the year to help educate about seasonal eating.
If you would like to do something similar with your group/organisation, reach out to Gavin at gavin@foundfood.com
https://foundfood.com/wp-content/uploads/2024/06/IMG_02681.jpg240180Gavinhttps://foundfood.com/wp-content/uploads/2024/05/Found_Food_Foraging_newlogoWhite-300x168.pngGavin2024-06-04 11:10:372024-06-04 11:32:57Using Free Wild Food to Supplement Your Diet, Improve Health, and Save Money
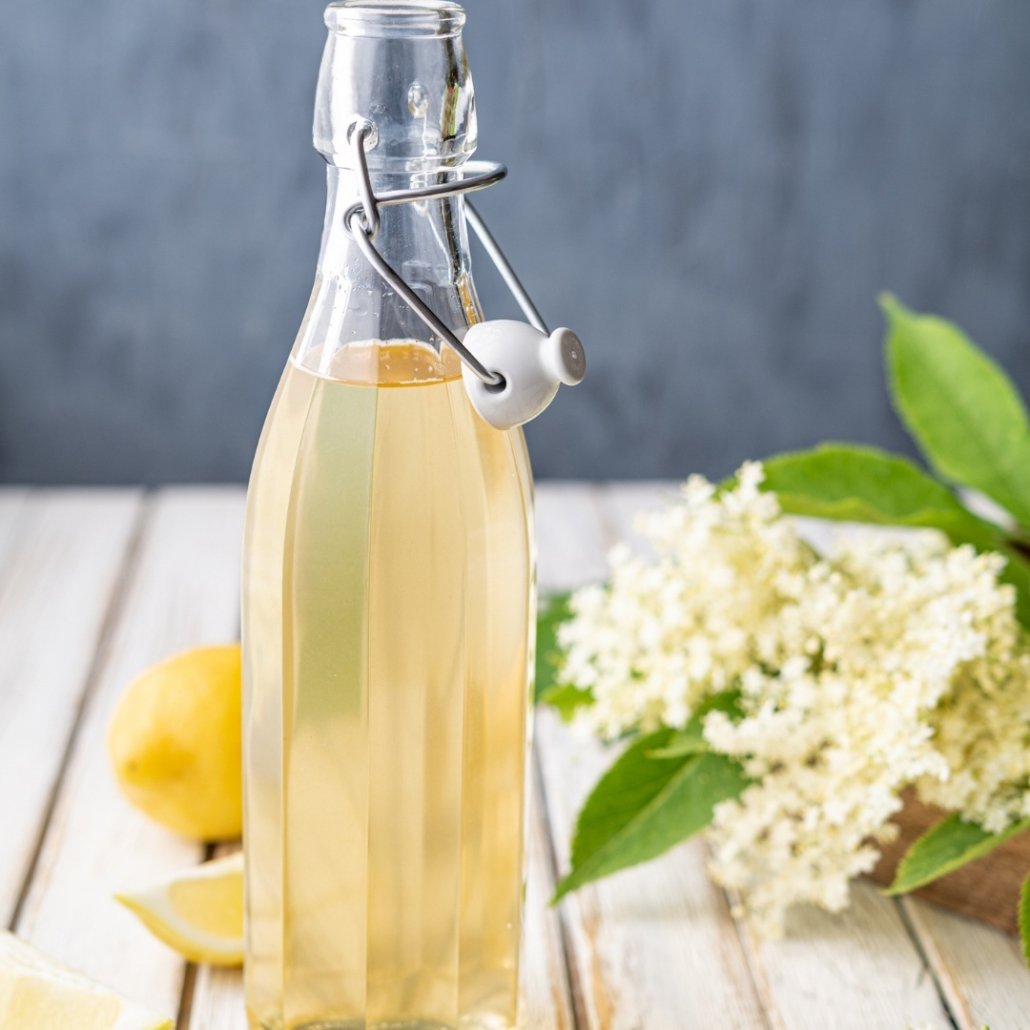
I love the smell and the taste of Elderflower, so every year it is a race to make as many things as I can from them to last for the rest of the year. This is one of the most versatile options because you can use it to make so many other things.
What you’ll need:
10 heads of Elderflowers.
750ml water.
Juice of 3 lemons or 2 teaspoons of citric acid.
600g sugar.
How to make it:
Heat the water and dissolve the sugar into it.
Take the water off the heat and add the lemon juice or citric acid, and the Elderflowers.
Make sure that the Elderflowers are properly submerged, and leave to infuse for 2 to 3 hours.
Strain the liquid through a muslin cloth, and pour into sterilised bottles.
Keep the bottles in the fridge and use within 3 months.
Now you have Elderflower cordial, you can have it as a cold drink, a hot drink, a cocktail, you can freeze it in cubes for other drinks, you can use it in baking and other desserts, you can add it to creams, and many many other uses.
Rosehips have been used for many, many years and it’s common knowledge that there is more vitamin C, pound-for-pound, than in an Orange. But what does it taste like? Well that’s a difficult question to answer as there isn’t anything else similar tasting. The best I can do is to say that it’s like a citrus fruit, but not like any other citrus fruit you’ve ever tasted.
It can be served as a lovely cold drink, a hot drink, and even as a non-alcoholic hot spiced cordial which is very reminiscent of mulled wine.
You can make this with cultivated rosehips (as long as they haven’t been sprayed), but I find that wild rosehips are much nicer.
What you’ll need:
1kg of wild rosehips.
3 litres water.
500g sugar.
Juice of 2 lemons or 2 teaspoons citric acid.
How to make it:
If your rosehips aren’t quite ripe and squishy, freeze them for a couple of days, then defrost them.
Roughly chop your rosehips and put in a pot with 2 litres of water.
Bring to the boil and keep boiling for 15 minutes.
Allow to cool and strain through a double layer of muslin, squeezing out as much juice as you can.
Put the pulp back into the pan and add another 1 litre of water.
Bring to the boil and keep boiling for 15 minutes.
Allow to cool and strain through a double layer of muslin, squeezing out as much juice as you can.
Discard the pulp now and bring the juice together in a pan.
Put the juice back on the heat and add the sugar, keep stirring until the sugar dissolves.
Allow to cool, then decant into sterilised bottles.
This will keep for 3 months or more in the fridge, if you can avoid drinking it all before then!
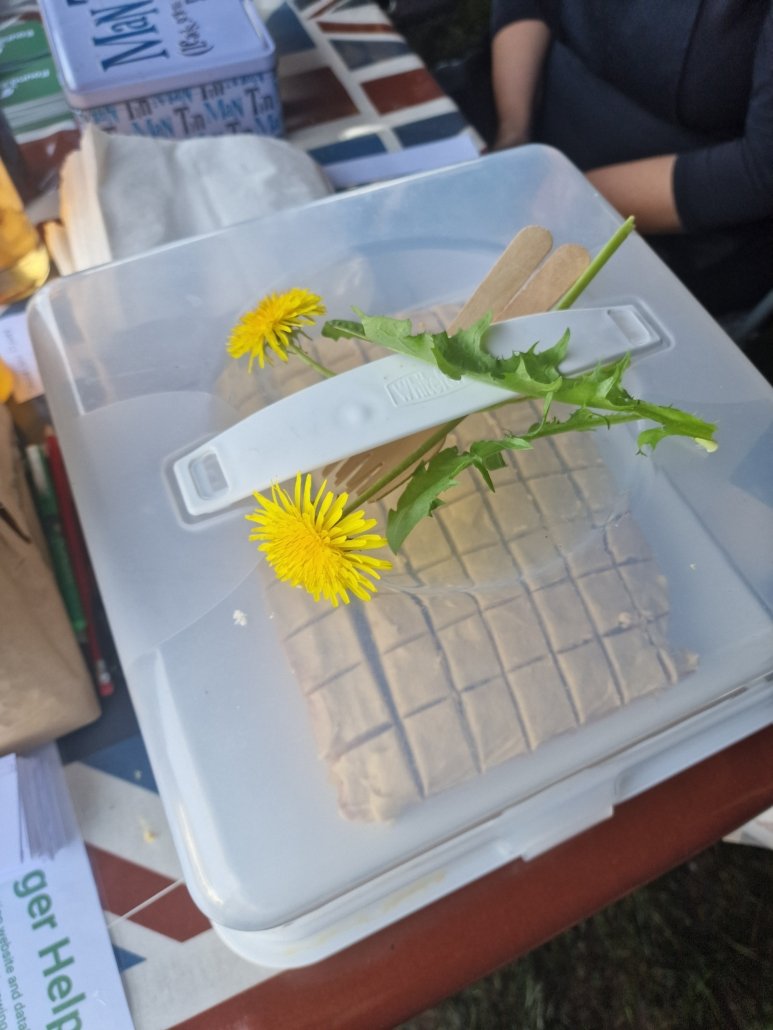
This cake is delicious and simple, and tastes a lot like coffee despite having no coffee in it!
Making the Roasted Dandelion Roots
Gather and clean your dandelion roots.
Remove the stringy little roots and cut into 5mm pieces.
Pre-heat the oven to 160 degrees and place the roots on a baking sheet.
Put the roots in the oven with the door slightly ajar for 15 minutes.
Close the door and roast for a further 30 minutes, or until they turn a very dark brown. NOTE: You need to keep a close eye on them as it’s a fine line between very dark brown and burnt!
Remove from the oven and allow to cool.
Store in an airtight jar.
Lightly grind a tablespoon in a pestle and mortar or coffee grinder, put it in a 2 cup French press (cafetiere), pour on hot water and leave to infuse for 30 minutes.
Making the Cake
Ingredients for sponge:
250g Self-raising flour
1 tsp baking powder
225g butter (room temperature)
225g caster sugar
4 large eggs
2 tablespoons dandelion root coffee.
Ingredients for icing:
100g softened butter
200g icing sugar
2 tablespoon dandelion root coffee.
Method:
Preheat your oven to 160 degrees (Fan).
Line an 18x28cm baking tin with baking parchment.
Put all the sponge ingredients in a bowl and mix until combined and smooth.
Put the sponge mixture in the pan and level with a knife or spatula.
Bake for 30 to 35 minutes or until a skewer comes out clean.
Allow to cool in the tin for 10 minutes, then turn out onto a wire rack to cool fully.
For the icing, beat the sugar and butter together until light and well mixed, then add the coffee and mix thoroughly.
Not so much a recipe, more just an idea of what to do with these wild vegetables. Usually, they’re steamed or boiled and used as a wild alternative to asparagus, but get them young and small enough and they make an excellent pickle.
Ingredients:
Apple Cider Vinegar.
Young Rosebay Willowherb shoots.
Method:
Pick young, small (less than 10cm) shoots.
Fill a clean jar with the shoots and fill with apple cider vinegar to cover all the shoots.
Leave in a warm, dry, dark place for 2 weeks.
Enjoy!
Rosebay Willowherb shoots have a little tanginess to them, so I use organic apple cider vinegar to balance that with the sweetness of the apples.
Stinging nettles have been used for dyes, fibres, herbal remedies and food for hundreds of years. During WW2, the British used nettles for their dark green dye for camouflage, and the Germans used huge quantities of nettles for their fibres to make military uniforms.
Habitat
It is native to Europe, Asia, northern Africa, and naturalised in North America, and introduced elsewhere. It can be found on waste ground, hedgerows, woods etc, preferring a rich soil and avoiding acid soils. Patches of healthy nettles are said to be an indicator of fertile ground, and possibly an indicator of previous human occupation.
Description
It is a herbaceous perennial flowering plant in the family Urticaceae. The species is divided into six subspecies, five of which have many hollow stinging hairs called trichomes on the leaves and stems, which act like hypodermic needles, injecting histamine and other chemicals that produce a stinging sensation upon contact (contact urticaria). Urtica dioica is a perennial growing to 1.2 m quickly. “dioica” refers to the botanical term, “dioecious” meaning that male and female flowers are on different plants.
Identifying Features
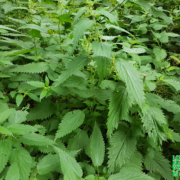
Stinging nettles
Leaves – The soft, green leaves are 3 to 15 cm long and grow in opposite pairs on an erect, wiry, green stem. The leaves have a strongly serrated margin, a cordate base, and an pointed tip with a terminal leaf tooth longer than adjacent lateral teeth.
The leaves and stems are very hairy with non-stinging hairs, and in most subspecies, also bear many stinging hairs (trichomes or spicules), whose tips come off when touched, transforming the hair into a needle that can inject several chemicals causing a painful sting or paresthesia, giving the species its common names: stinging nettle, burn nettle, burn weed, or burn hazel.
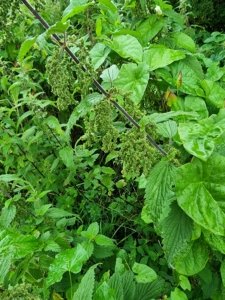
Flowers – It bears small, greenish or brownish, numerous flowers in dense axillary inflorescences.
Roots – It has widely spreading rhizomes and stolons, which are bright yellow, as are the roots.
Pictures
Stinging nettles
Uses
Food
Young leaves – can be cooked and used the same as spinach (i.e. boiled or steamed) and added to soups etc. They also make excellent fried crisps. They can also be dried for winter use. Nettles are a very valuable addition to the diet, they are a very nutritious food that is easily digested and is high in minerals (especially iron) and vitamins (especially A and C). Cooking the leaves, or thoroughly drying them, neutralises the sting, rendering the leaf safe to eat. Heating to above 60 degrees celcius renders them sting-less by bursting the sack of chemicals at the base of each sting. Dehydrating nettles breaks the needles, rendering them safe. The needles can also be broken by physical means, such as slapping, flattening with a rolling pin, etc. The young shoots, harvested in the spring when 15 – 20 cm long complete with the underground stem are very nice. Old leaves can cause an upset stomach. The juice of the leaves, or a decoction of the herb, can be used as a rennet substitute in curdling plant milks for making cheeses. Nettle wine is brewed from the young shoots, and a strong nettle decoction can be added to brewing ale for flavouring.
Nettles have a long history of use in the home as a herbal remedy and nutritious addition to the diet. A tea made from the leaves has traditionally been used as a cleansing tonic and blood purifier so the plant is often used in the treatment of hay fever, arthritis, anaemia etc.
Other uses
A strong fibre is made from the stems. Used for making string and cloth, it also makes a good quality paper. It is harvested as the plant begins to die down in early autumn and is flattened and dried before the fibres are extracted. The fibre is produced in less abundance than from flax (Linun usitatissimum) and is also more difficult to extract.
The plant matter left over after the fibres have been extracted are a good source of biomass and have been used in the manufacture of sugar, starch, protein and ethyl alcohol.
An oil obtained from the seeds is used as in oil lamps.
The leaves are also an excellent addition to the compost heap and they can be soaked for 7 – 21 days in water to make a very nutritious liquid feed for plants. This liquid feed is both insect repellent and a good foliar feed.
The growing plant increases the essential oil content of other nearby plants, thus making them more resistant to insect pests.
Although many different species of insects feed on nettles, flies are repelled by the plant so a bunch of freshly cut stems has been used as a repellent in food cupboards. The juice of the plant, or a decoction formed by boiling the herb in a strong solution of salt, if rubbed into small seams of leaky wooden tubs, will coagulate and make the tub watertight again.
A hair wash is made from the infused leaves and this is used as a tonic and antidandruff treatment.
A beautiful and permanent green dye is obtained from a decoction of the leaves and stems. A yellow dye is obtained from the root when boiled with alum.
Folklore
Being very common, the stinging nettle has much lore and myth surrounding it; here are some of the more common ones:
The name “Nettle” is said to have come from the Anglo-Saxon word for needle, probably referring to its stinging needles (hairs), or possibly referring to its value as a thread (seems less likely).
In Irish mythology, when the children of Lir (sea god) returned from hundreds of years in exile, they found their home overgrown with nettles; as did Oisin on returning to his great hall. Unsurprising when nettles are so commonly found in wasteland and abandoned places.
Dreaming of gathering nettles is said to mean that someone likes you, or that your marriage will be a happy one; Whereas dreaming of being stung means something bad is coming.
In Germany and Wales, folk songs associate nettles with love and fertility.
Across the British Isles, many stories exist concerning the origin of nettles, including that they mark the spots where Satan and his fallen angels fell to earth, that they grow from dead men’s bodies or from the spilling of innocents’ blood, and that they grow from human urine (though they do prefer nitrogen rich soil, so there may be some truth in that one!).
Known hazards
The leaves of the plants have stinging hairs, causing irritation to the skin. This action is neutralized by heat or by thorough drying, so the cooked leaves are perfectly safe and nutritious. However, only young leaves should be used because older leaves develop gritty particles called cystoliths which act as an irritant to the kidneys. Possible interference with allopathic drugs for diabetes mellitus, hypertension. Central nervous system depression drugs (e.g. morphine, alcohol) may also interact with nettle. Avoid during pregnancy.
Harvesting
It is in leaf from March. It is in flower from May to October, and the seeds ripen from Jun to October. For medicinal purposes, the plant is best harvested in May or June as it is coming into flower and dried for later use.
Potential lookalikes
White deadnettle (Lamium album) can look very similar, but bears distinctive white flowers. Also edible.
Sources
Wikipedia – https://en.wikipedia.org/wiki/Urtica_dioica
It’s difficult to think of nettles in anything other than savoury but I hope this recipe will change your mind . The reason I like this recipe is because I wanted to find a use for the older nettle leaves that I can’t use for eating fresh like you do with the nettle tops. This is perfect with ice, goes nicely with a G&T and with tonic water.
I will often make this with the discarded nettle leaves I won’t use for making crisps.
Ingredients:
200g nettle leaves.
500g caster sugar.
4 Squeezed Lemons or 4tbsp lemon juice.
500 ml water.
Method:
Put your nettles and water in a large pan and bring to the boil for 10 minutes.
Strain the nettles out of the liquid through a fine mesh colander or a cloth.
Take the strained juice and add the sugar to it.
Put this back on the heat and warm slowly, stirring until the sugar is dissolved.
Remove from the heat and stir in the lemon juice.
Allow it to cool and place in sterilised bottles.
Use within 6 months, once opened keep in the fridge and use within 2 weeks.
Enjoy with sparkling water, water or add to jellies, ice lollies to give a wild nettle flavour.
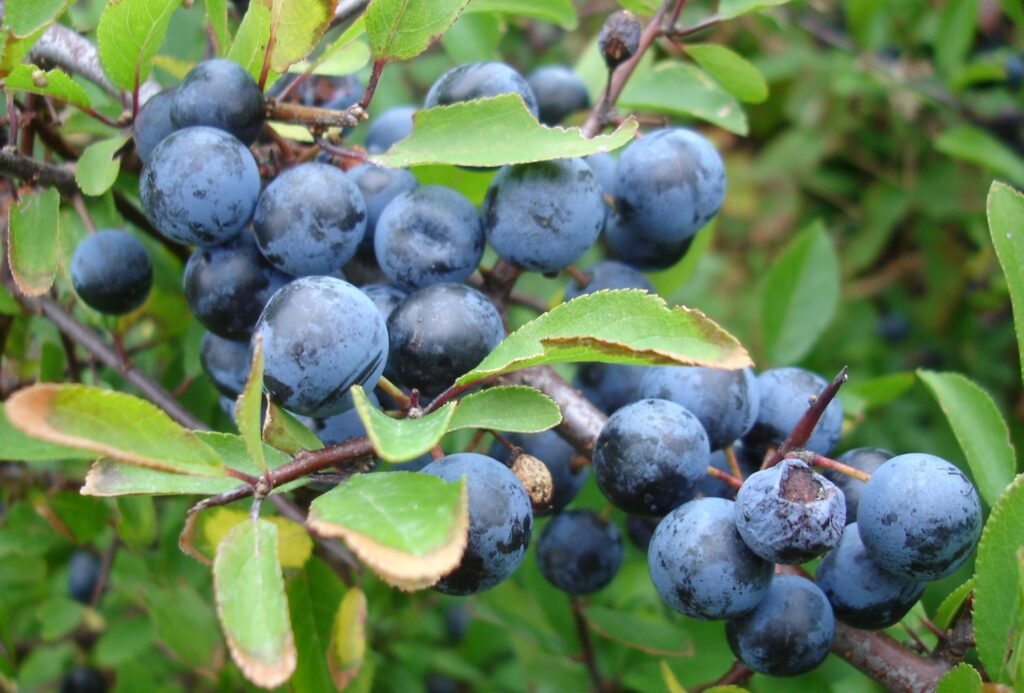
Winter is upon us, the frosts have started already and it’s tempting to wrap up warm and stay indoors, but there’s still a whole world of food to be had out there. For this article I want to pick on a commonly used plant that seems to not get much use outside of making booze. I am of course talking about the humble Sloe of the Blackthorn bush (Prunus spinosa).
I’m not going to dive into recipes or variations for sloe gin, Epine aperitif, or even sloe wine (another of my favourites). After all, it’s very simple and there are tons of recipes out there already; not to mention that you can now buy sloe gin off the shelf (and I won’t start on all the reasons why that’s wrong!).
Blackthorn bushes in blossom
Species
Blackthorn is a member of the Rose family and like most fruit of the Rosacea, it has seeds/stones containing compounds which can convert to hydrogen cyanide in the stomach, however you’d have to consume a lot of the seeds for it to affect you, and we’re discarding the stones today anyway; It’s that hydrogen cyanide compound that gives almonds their flavour, and which comes out in sloe gin if it’s infused for a long time. Trust me, it’s a good thing.
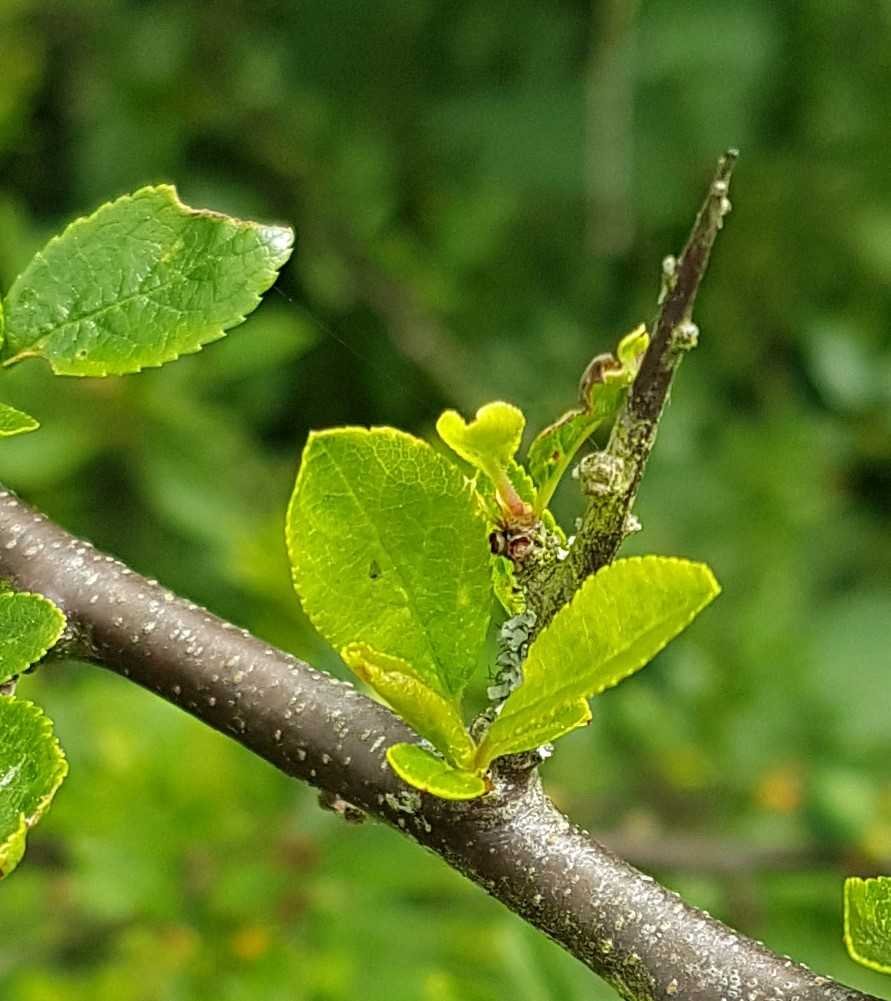
Identifying Blackthorn
Blackthorn grows in dense tangled bushes, with evil black spikes up to a couple of inches long, so when picking the berries it’s best to wear suitable clothing or be very careful. If you’re looking to identify it in spring Blackthorn and Hawthorn can have very similar flowers and spikes, but where Blackthorn flowers before its leaves appear, Hawthorn flowers after its leaves have appeared. If the leaves are out it’s much easier. Blackthorn has simple small leaves, Hawthorn has lobed leaves.
Blackthorn thorn and leaves
Eating Sloe Berries
As you probably know already, sloes are a wild plum but are incredibly sour and astringent until they’ve been frozen. Whether by the natural frosts or by putting them in the freezer for a day or two, the freezing process releases more of their natural sugars and makes them much more palatable for our infusions. A few years ago, I was licking my fingers after preparing some berries for wine and it struck me that now they’re nice and sweet, why not use them like a normal plum?
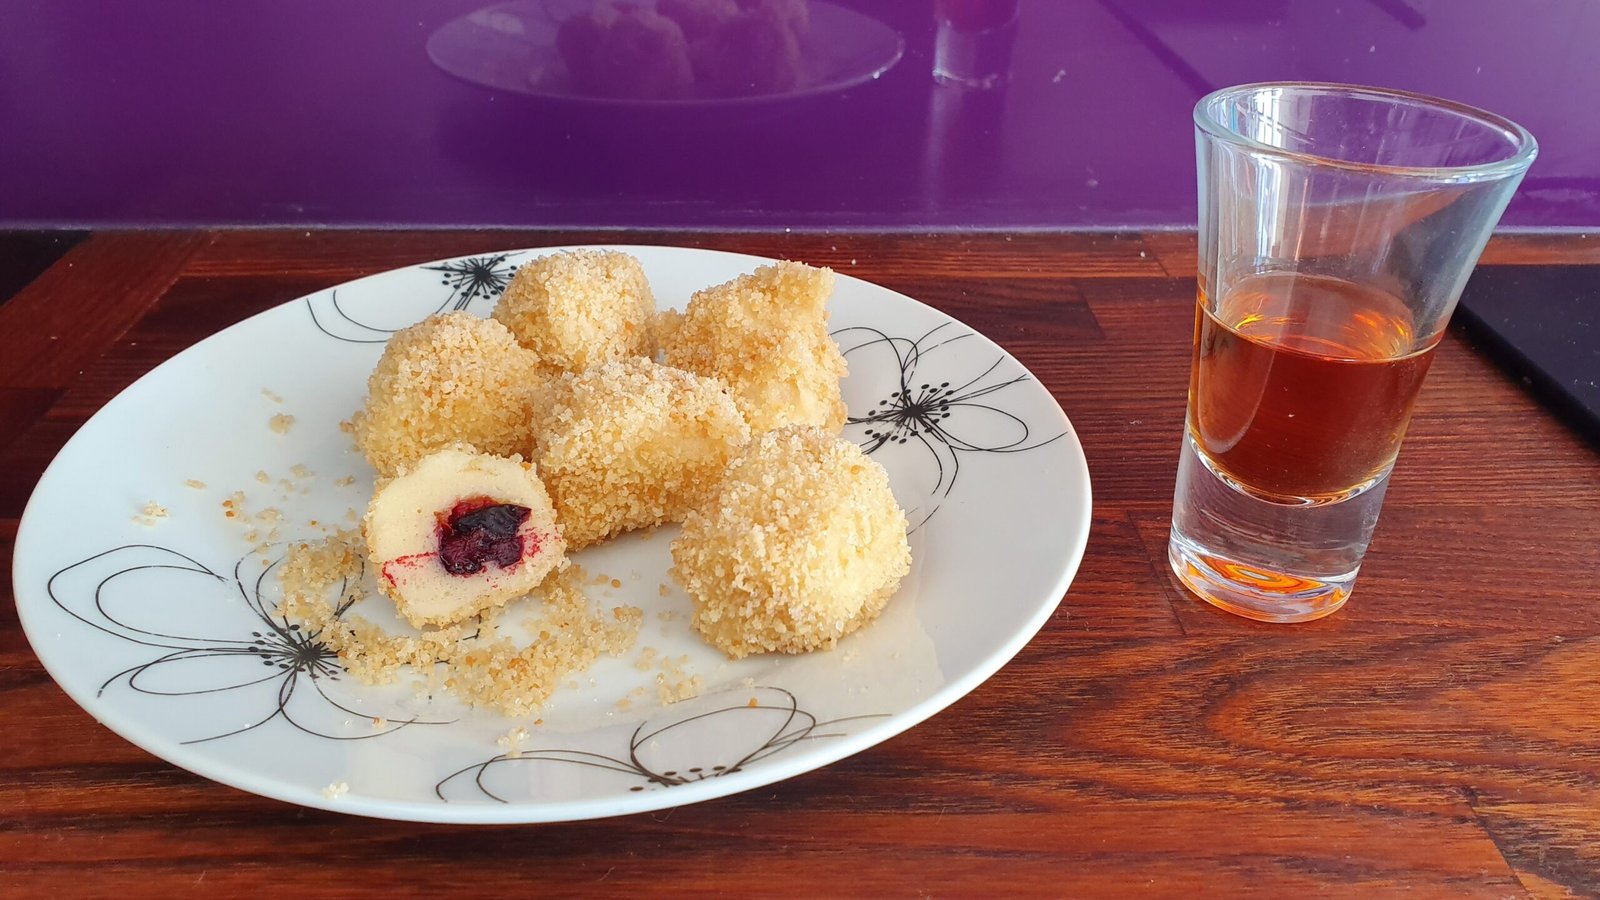
Sloe Dumplings
This is your recipe for this issue. I adapted it from a family recipe which used shop bought plums, which was lovely but I think that these small snack size versions are even better:
Ingredients
12 frozen sloes
1 tbsp caster sugar
125g peeled potatoes
20g butter unsalted
50g breadcrumbs
20g granulated sugar
1 egg
60g plain flour
Pinch salt
Pinch cinnamon
Method
Put your potatoes on to boil. You want it nice and soft, like your going to make mash.
Clean your sloes and make sure that they’re defrosted. Remove the stones keeping as much of the flesh as possible. Sprinkle the caster sugar over the sloes.
Melt the butter in a pan and add the breadcrumbs. Cook gently until golden brown then remove from the heat. Stir in the granulated sugar thoroughly and set aside to cool.
When the potatoes are done and cool enough to handle, shred them into a bowl – I just mash them with a fork.
Add the egg, salt, cinnamon and flour and mix into a sticky dough. If it’s too wet add a little more flour.
Get a pan of water on the boil.
Take a small piece of dough at a time, flatten it into a 5mm thick circle. Add the sloe, fold the dough and shape into a ball. TOP TIP: If you find the dough too sticky to mould in your hand, wet your hands; It makes it much easier.
A few at a time, drop the dough balls into the simmering water and cook until they rise to the surface.
Remove using a strainer to drain excess water and put straight into the breadcrumbs. Roll them around so they’re coated and leave to cool.
Serve the dumplings cold, maybe with custard or a little Sloe port.
Sloe dumplings
Health Benefits
Sloe berries are rich in Vitamin C and Vitamin E, and also have concentrations of potassium, calcium and magnesium. They’re also packed with antioxidants, phenols and essential fatty acids, all of which are good for maintain health and reducing the likelihood of chronic disease.
Sloes
Summary
When we’re looking at foraged food it is sometimes easy to stick with what we know, even making small changes to recipes, and we often overlook the basic nature of a thing. Sloes are wild plums and we know that they sweeten up when frozen and defrosted, so why not use them as tiny plums? OK, so they’re a little fiddly, but I think it’s well worth the effort. I can promise you that they make lovely desserts, sweet and sour sauces, and this year why not try a lovely rich sloe sauce to go with your Turkey?
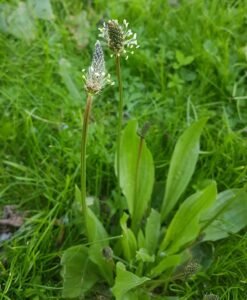
Spring is well and truly sprung and the perennial weeds are popping up everywhere, much to the disgust of proud gardeners and allotment owners. A lot of the weeds have medicinal and edible uses, but some are better than others, and frankly some of them are little more than wild salad “fillers”. However, there’s one particular genus/group of prevalent weeds with medicinal qualities, nutritional benefits and they actually have a taste worth looking for too. It’s the plantain herb (genus Plantago), also known as fleaworts.
As the title suggests, I often find myself saying “it’s not related to the banana-like vegetable which you see at the supermarket”.
At the last count there were about 200 species in the genus, but I tend to stick with wide-spread, UK-based varieties such as Broadleaf (Plantago major), Ribwort (Plantago laceolata) and occasionally Sea (Plantago maritima) and Buckshorn (Plantago coronopus); All of which have very similar properties and uses. They all have slightly different seasons, with Broadleaf tending to pop-up first, then Ribwort a little later, and Buckshorn and Sea Plantain from about mid-summer; As with all of these things, it depends upon your location, and the current weather conditions.
Identifying plantain
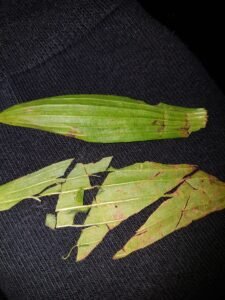
It’s easy to ignore and walk all over, because it is a very common weed, and without its flower heads it blends into the grassy background easily; But once you’ve learnt to recognise it, you’ll see it everywhere. Whilst the basic leaf shapes may vary (Broadleaf has wide, round leaves; Ribwort has long, strap-like leaves), there are some features that they all have in common:
Parallel leaf veins – The leaf veins run from base to tip and are usually easy to see. If you’re really careful, you can tear a leaf and the ribs can stay attached so you have two halves of a leaf attached by threads.
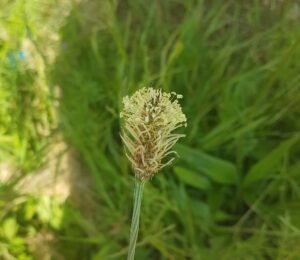
Flower spike – They all send up a long flower spike with tiny veins.
Eating plantain herb
General rules of foraging withstanding (look for potential contamination, condition, wash it, etc.), plantain leaves, stalks and flower heads can be eaten raw – and this is where the surprising taste comes through. At first, it’s a bit of a plain “green” taste, but give it a good chew, get your juices flowing and get it to the back of your mouth and… Mushrooms. If you’ve never tried Plantain before, you really have to give this a go; I promise you won’t be disappointed. The most intense flavour seems to come from the flower heads (they’ll be out in a few months’ time), but the leaves give the same flavour too.
Recipes
Crisps
A very quick and easy snack. Wash and dry your plantain leaves (I find that broadleaf works best for this) and put them into a shallow pan of hot oil. Don’t overcrowd the pan or they’ll just wilt and not crisp up. Give them up to 30 seconds, turning once if necessary, then drain and eat as a nice little snack. They can be salted while they’re cooling too, if you like.
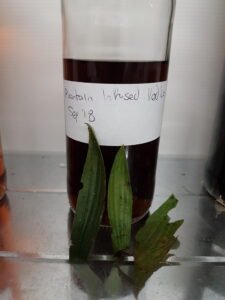
Vodka
This was a mad idea I had one day of getting an earthy, mushroom flavour into cocktails. Leaves and seeds infused in vodka for 3 months, then strained. The earthy flavour counterbalances sweetness, but I find a little bitterness really lifts it. So mixed with nettle cordial for the sweetness, a few splashed of home-made bitters (or Angostura), and topped with tonic water works well.
Plaintain infused vodka bitters
Plantain herb and garlic mustard risotto
This is your full recipe for this issue. Apart from the fact that it makes a really good flavour, I’ve sold this idea to learner foragers who are scared of mushroom picking – It means that you can have a mushroom and garlic risotto with no mushrooms or garlic!
Plantain herb and garlic mustard risotto
Ingredients
2 tbsp oil
1 large white onion
4 large handfuls of plantain herb leaves, stalks and flower heads
2 litres of water (to make 1 litre of stock)
250g Risotto rice
1 handful of garlic mustard leaves
Method
Put 2 handfuls of leaves, stalks and flowers in a couple of pints of water, bring to the boil and simmer for at least 1 hour. Allow to cool and strain out the plants. Add the remaining fresh plants and simmer again for 1 hour, then strain.
If the stock isn’t already reduced to 1 litre, simmer it again to reduce.
Fry a chopped onion in a little oil until golden.
Add the risotto rice and toss in the onion and oil.
Add a little plantain stock and stir until it is soaked up.
Repeat until the rice doesn’t soak up the stock any more, then put the rest of the stock in.
Keep on a low heat until all the stock is gone and the rice is thick and sticky.
Remove the risotto from the heat and stir your sliced garlic mustard leaves through.
NOTE: Garlic mustard leaves can have a very bitter after taste but cooking them can kill the gentle garlic flavour. We stir them through at the end like this, because a little heat tames the bitterness without destroying the garlic flavour.
Health benefits
Plantain has a long history of being used in traditional herbal medicine, and for very good reason. Modern investigations have shown most traditional uses are actually highly effective.
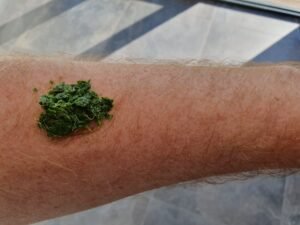
Plantain is “mucilaginous” which means that it has a soothing effect on both the skin and the mucous membranes, so it is an effective relief for burns, bites and stings, as well as on coughs, sore throats, and urinary tract infections. I’ve found that it is best used as a fresh, first-aid herb for burns, bites and stings – you can crush the leaves with a little water and apply directly; If it’s for me, I’ll chew them with a little spit and apply it. For internal injuries or issues, you can make a tea from either fresh or dried herb. Just pour hot water over the leaves and allow to infuse for 10 to 15 minutes. As well as mucilage and its soothing, anti-inflammatory ability, studies have found that Plantain contains allantoin, a substance proven to stimulate the regeneration of tissues for healing, and aucubin, with proven antibiotic actions.
Summary
To native Americans, this was known as “White man’s footprints” because it spread wherever the European settlers went. Apart from kids using it as an improvised gun, or the species Plantago psyllium used for improving digestive transit, this little weed gets largely ignored; I hope that after reading this, you’ll realise its amazing food and medicine benefits and make good use of it.
Originally published in The Bushcraft Journal Issue 25 - 2019
https://foundfood.com/wp-content/uploads/2021/03/RibwortPlantain-scaled.jpg25602111Gavinhttps://foundfood.com/wp-content/uploads/2024/05/Found_Food_Foraging_newlogoWhite-300x168.pngGavin2020-05-13 11:27:482023-12-07 12:00:13Not a banana – plantain herb
We may request cookies to be set on your device. We use cookies to let us know when you visit our websites, how you interact with us, to enrich your user experience, and to customize your relationship with our website.
Click on the different category headings to find out more. You can also change some of your preferences. Note that blocking some types of cookies may impact your experience on our websites and the services we are able to offer.
Essential Website Cookies
These cookies are strictly necessary to provide you with services available through our website and to use some of its features.
Because these cookies are strictly necessary to deliver the website, refusing them will have impact how our site functions. You always can block or delete cookies by changing your browser settings and force blocking all cookies on this website. But this will always prompt you to accept/refuse cookies when revisiting our site.
We fully respect if you want to refuse cookies but to avoid asking you again and again kindly allow us to store a cookie for that. You are free to opt out any time or opt in for other cookies to get a better experience. If you refuse cookies we will remove all set cookies in our domain.
We provide you with a list of stored cookies on your computer in our domain so you can check what we stored. Due to security reasons we are not able to show or modify cookies from other domains. You can check these in your browser security settings.
Other external services
We also use different external services like Google Webfonts, Google Maps, and external Video providers. Since these providers may collect personal data like your IP address we allow you to block them here. Please be aware that this might heavily reduce the functionality and appearance of our site. Changes will take effect once you reload the page.
Google Webfont Settings:
Google Map Settings:
Google reCaptcha Settings:
Vimeo and Youtube video embeds:
Privacy Policy
You can read about our cookies and privacy settings in detail on our Privacy Policy Page.